Overview
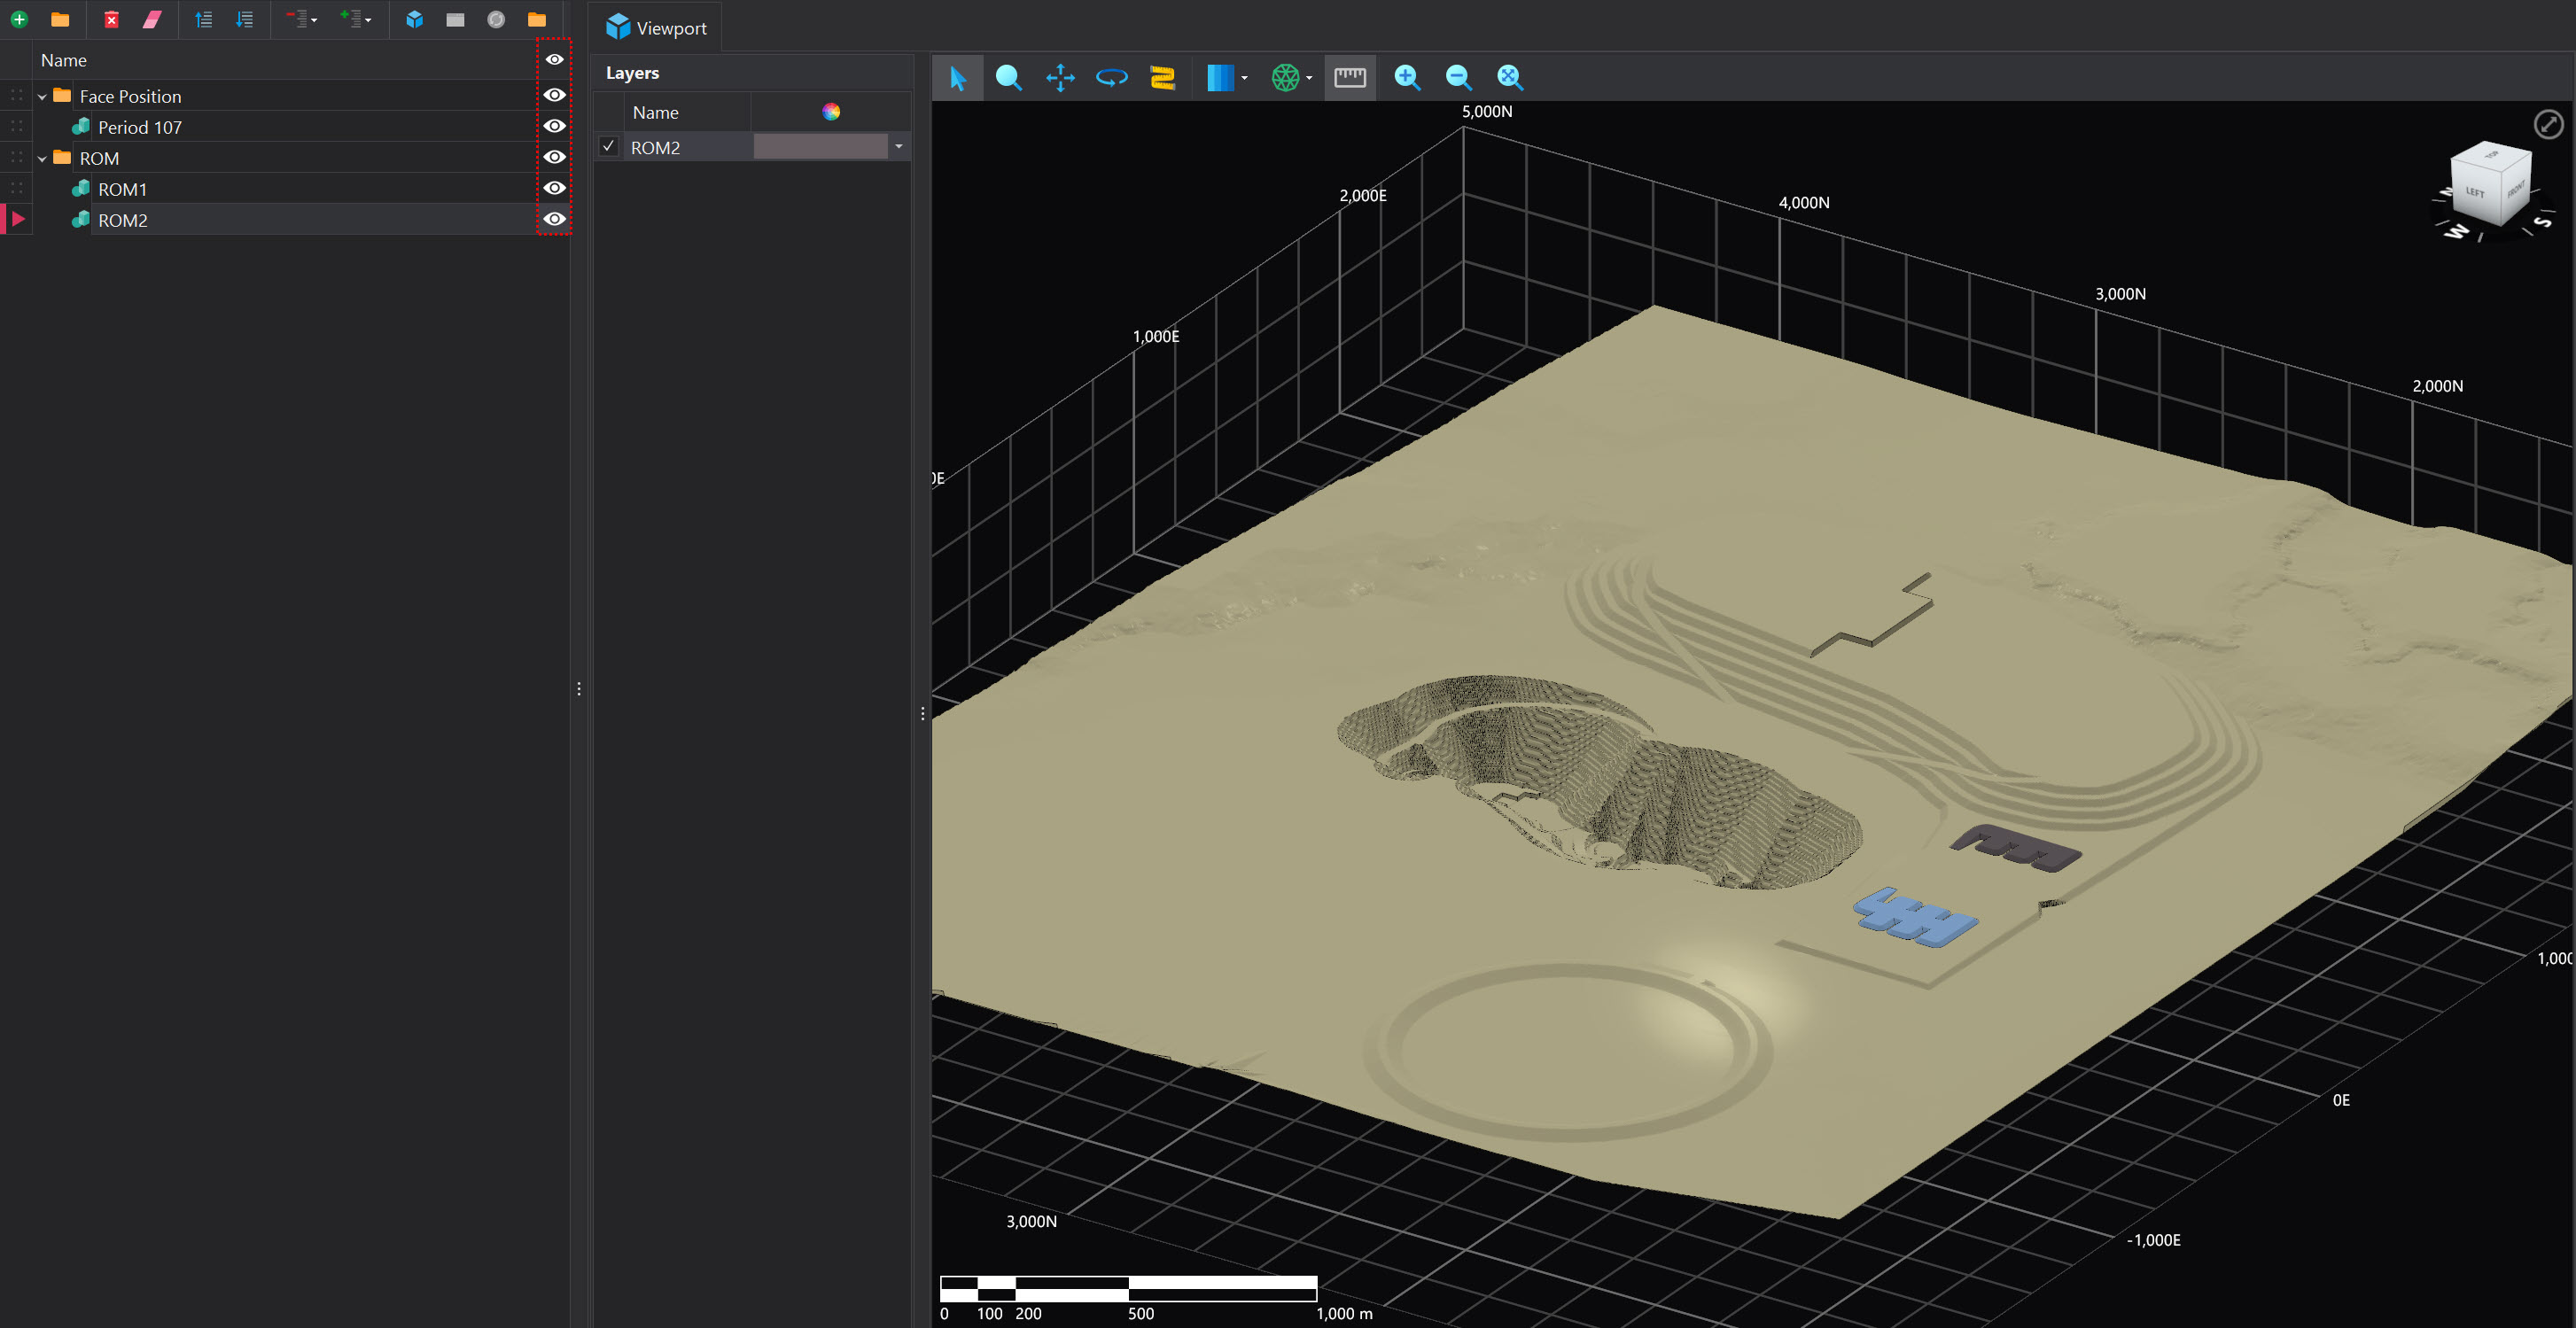
The Assets UI features several key components, each numbered on the image below. Each number on the image corresponds to the detailed description provided in this page, illustrating the function and purpose of each component.

1. File Toolbars
A variety of tools are available for managing asset files within the project. These tools are summarised in the Common User Controls page which can be found here. Additionally, the following tools are available exclusively in the Assets tab:
| Tool | Description |
|---|---|
 Content Display Content Display |
|
 Source Management Source Management |
|
2. Asset File Tree
The Asset file tree displays the hierarchical structure of assets currently imported into the project. Assets can be nested within folders, and folders can be nested within other folders, providing an effective way to organize and manage large numbers of files.
Properties
Each item in the tree has the following properties:
| Property | Description |
|---|---|
| Name | The name of the item to be used downstream. By default, the name for imported files is populated automatically based on the file name. This name can be manually overridden by typing directly into the name cell. |
| Visibility | Toggle the eye icon to change the visibility state. Changing the visibility state of a folder also updates the state of its nested items. |
Files can be repositioned by dragging and dropping them within the file tree, offering a straightforward method for reorganizing your project structure. This drag-and-drop functionality is consistently available across all file trees throughout the software
3. Layers List
Imported files, like DXF files, often contain multiple layers. The layers found in the selected file are shown in the layers list, offering a clear and organized view of the file's components.
Properties
| Property | Description |
|---|---|
| Color and Appearance | The appearance of each layer can be configured. More information about this can be found in the Overrides page. |
| Visibility | Each layer can be toggled on or off using the checkbox next to its name. If the visivility of all the layers within an imported file are turned off, the file name will be crossed out in the File Tree. |

4. Viewport Toolbar
A number of tools are available navigating and interacting with the imported files. The functionality of each tool is outlined in the Common User Controls page which can be found here.

5. Viewport
The viewport is your primary workspace for interacting with imported files. It provides a visual interface where you can view your files using various mouse controls.
Mouse Controls
| Control | Description |
|---|---|
| Mouse Wheel (Press) | Press and hold the middle mouse button to pan across the view. |
| Mouse Wheel (Scroll) | Use the middle mouse wheel to zoom in and out smoothly. |
| Right Mouse Button | Hold the right mouse button and move the mouse to rotate the view around the cursor position. |